Our use of loops thus far have allowed us to write a little bit of code which is run for many data points. That's one big theme in computer code. The if-statement, the topic of this section, will add a second theme: the ability to write a true/false test to control if a bit of code runs or not. Combined with the loop, the if-statement will greatly expand what we can do with code.
The if-statement has a true/false test which controls if some code is run or not. Here is an example if-statement shown inside a for-loop:
image = new SimpleImage("flowers.jpg");

for (pixel: image) {
  if (pixel.getRed() > 160) {
    pixel.setRed(0);
    pixel.setGreen(0);
    pixel.setBlue(0);
  }
}

print(image);
For each pixel, the if-statement above retrieves the red value, and tests if the value is greater than 180. If the test is true, the if-statement runs the then-code inside the curly braces. If the test is false, the then-code is skipped. In this case, the then-code changes the pixel to be black.
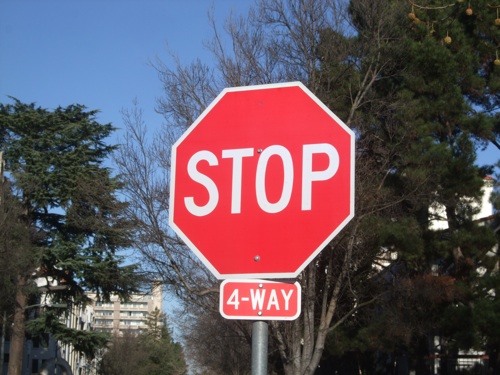
Here we'll use this picture of a stop sign:
|
|
Trying to change the stop sign to be blue, the test (red > 160) gets both white and red areas. The problem with that approach is that the red value is high in two kinds of cases -- the red part of the sign we want, but also parts of the scene that are near white. Recall that pure white is (255, 255, 255), so in whitish areas, all three values are high, so our (red > 160) test gets those too -- the white letters inside the sign are a clear example of this problem. Next we'll improve the test so it can distinguish the red and white parts of the sign.
Suppose we have three pixels. Each pixel has the familiar red/green/blue values. Suppose these three values are graphed as bar graphs like this:
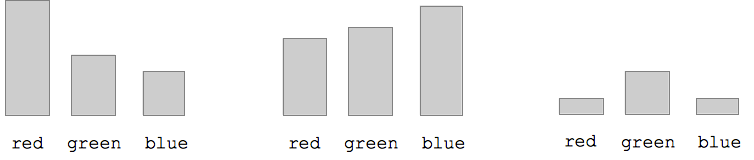
Q: Each pixel has one of red/green/blue which is strongest. Look at the graphs to figure which shade dominates for each pixel. It's just whichever bar is tallest. Or to be specific, whichever bar is tallest relative to the others. The problem with our earlier strategy was that it just looked at absolute numbers -- (red > 160) -- failing to take into account this relative quality -- which bar is higher than the other two.
Recall this code which, inside a loop, computes the average of the red, blue, and green values and stores that number in a variable "avg".
avg = (pixel.getRed() + pixel.getGreen() + pixel.getBlue())/3;
Here are the three pixels again, but now the avg value is show as a line drawn across the bars.
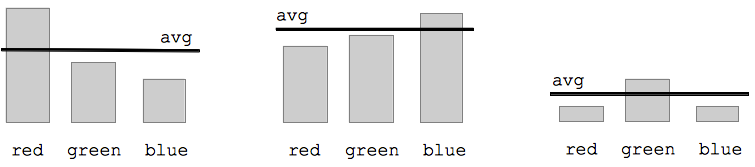
The avg gives us a handy way to tell if a color is high relative to the others. A pixel is reddish if the red value is over the avg. So here the first pixel is reddish and the other two are not. Or in terms of code, the test will look like (pixel.getRed() > avg) -- this will add the "relative to the other colors" quality that the previous test was missing.
|
|
This is a better way to select the red parts of the sign. For each pixel, first compute the average value for that pixel. Then compare the red value to the average to decide if the pixel is reddish. Rather than checking the literal value of the red (e.g. 160), this checks if the red is relatively large compared to the other two colors .. does the pixel lean towards red. If the test is (pixel.getRed() > avg) we get all the areas that have every a tiny red cast, which is not restrictive enough. The fix is to multiply the avg by some factor to make it more restrictive, like this:
(pixel.getRed() > avg * 1.1). The specific value, 1.1, can be tuned by trying different values, until we get the look we want. Try the values: 0.9, 1.2, 1.4, 2, 2.5. The larger the value, the higher the bar is set to detect red pixels. By adjusting the * factor, we can zero in on the look we want. Here I think 1.4 looks pretty good.
Suppose you are visiting Stanford and you park your car here, and get a parking ticket. Philosophically, they say that you are better off taking in events as they have actually happened. Nonetheless, here we'll try to fix history in code.
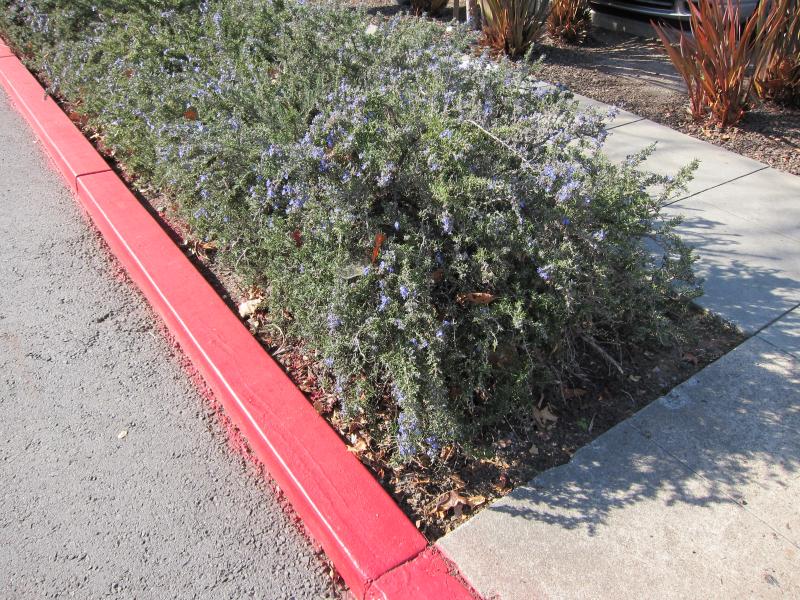
Challenge: write code to detect the red curb, (a) change it to medium gray red=120 green=120 blue=120. (b) change just the red curb to be grayscale, which will look more realistic. Rather than changing the whole image to grayscale, we change just the red areas. Recall that the algorithm to change grayscale is to set red/green/blue values all to be the average value.
|
|
Solution code (b):